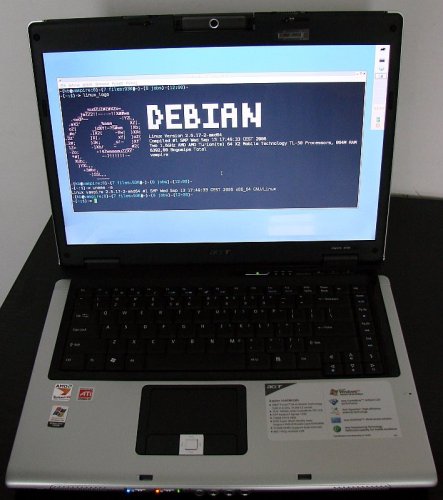
Installing, configuring and using Debian GNU/Linux on Acer Aspire 5102 WLMi notebook.
Hardware overview
- AMD Turion™ 64 X2 Mobile Technology TL-50 (2x256KB L2 cache, 1.6GHz)
- 1GB (512/512) DDR SDRAM
- 120GB hard drive
- integrated Super-Multi drive (DVD+R, DVD-R, DVD-RAM)
- 5-in-1 card reader
- 15.4″ WXGA (1280 x 800) TFT display
- integrated ATI® Mobility™ Radeon® Xpress 1100 graphics
- 802.11b/g WLAN
- 10/100 LAN
- V.92 modem
Devices that works with Linux
- USB (works just after install),
- DVD+/-RW (works with boot CD),
- Graphic: both 2D and 3D works with both FLOSS and proprietary drivers, radeonfb does not works (yet), vesafb works,
- Sound: works, but I need to pass options to module to make sound work properly,
- Ethernet: works with Debian Installer images,
- Wireless LAN: works even in Monitor mode with packet injection,
- Bluetooth: works fine (tested with Sony Ericsson K700i mobile phone),
- PCMCIA: works (tested with TP-Link TL-WN510G WLAN card).
Also “Suspend to RAM” works using sysfs method of hibernate script. “Suspend to disk” works using ususpend method.
Devices that does not work with Linux
- Webcam: does not work (m560x driver is in pre-alpha state),
- Card reader: memory card is not detected (but at least SDHCI detected),
- Modem: does not work with sl-modem-daemon,
Devices
- Linux kernel messages
- PCI devices list
- USB devices list
- Processor details (note that CPU(s) frequency was reduced by powernowd)
Configuration
CPU
To use PowerNow technology included in AMD Turion(tm) 64 X2 Mobile Technology TL-50 you need to insert some modules into kernel and use userspace powernowd daemon.
Use modprobe to load this modules, and do not forget to include them in /etc/modules.
cpufreq-userspace
powernow-k8
Now test if everything load properly with dmesg | tail. Messages about your processor(s) should appear.
# dmesg | tail
powernow-k8: Found 2 AMD Athlon 64 / Opteron processors (version 1.60.2)
powernow-k8:    0 : fid 0x8 (1600 MHz), vid 0x12 (1100 mV)
powernow-k8:    1 : fid 0x0 (800 MHz), vid 0x1e (800 mV)
cpu_init done, current fid 0x8, vid 0x12
Install powernowd:
# aptitude install powernowd
Note: you may use any CPUfreq policy governor (powersave, conservative, ondemand). I just prefer userspace tool. LessWatts folks prefer ondemand.
Note: to test if it works as expected try:
# invoke-rc.d powernowd stop
Stopping powernowd: powernowd.
# cat /proc/cpuinfo | grep MHz
cpu MHz         : 1600.000
cpu MHz         : 1600.000
# invoke-rc.d powernowd start
Starting powernowd: powernowd.
# cat /proc/cpuinfo | grep MHz
cpu MHz         : 800.000
cpu MHz         : 800.000
HDD
Install hdparm’ and edit /etc/hdparm.conf. At the bottom add:
/dev/hda {
        io32_support = 1
        mult_sect_io = 16
        interrupt_unmask = on
        dma = on
        lookahead = on
}
Now restart hdparm:
# invoke-rc.d hdparm restart
Setting parameters of disc:
/dev/hda:
 setting 32-bit IO_support flag to 1
 setting multcount to 16
 setting unmaskirq to 1 (on)
 setting using_dma to 1 (on)
 setting drive read-lookahead to 1 (on)
 multcount    = 16 (on)
 IO_support   =  1 (32-bit)
 unmaskirq    =  1 (on)
 using_dma    =  1 (on)
  /dev/hda.
Graphic
No FLOSS 3D drivers for Radeon Xpress 200M available yet.
Setup your apt to use “non-free” and install ATI proprietary driver if you need 3D. 2D operations are handled by FLOSS driver included in your X.Org installation.
To install fglrx use this:
# aptitude upgrade
# aptitude --with-recommends install fglrx-driver fglrx-kernel-src fglrx-control-qt3
# m-a update
# m-a a-i fglrx-kernel-src
# modprobe fglrx
# dmesg | tail
# aticonfig --initial
Note: you need installed module-assistant. If you do not have it install it and run ”module-assistant prepare”.
Note: after reload of X server screen stays blank for unknown reason. After reboot everything works fine.
POWERplay
(Tested only with proprietary ATI drivers.)
To list available POWERplay states type:
$ aticonfig --lsp
    core/mem      [flags]
-----------------
  1: 100/133 MHz
* 2: 301/301 MHz  [default state]
To set power state:
$ aticonfig --set-powerstate=1
Note: display will flash once while profile is changed.
List power states again to check:
$ aticonfig --lsp
    core/mem      [flags]
-----------------
* 1: 100/133 MHz
  2: 301/301 MHz  [default state]
External VGA connector
(Tested only with proprietary ATI drivers.)
To enter single display mode use:
# aticonfig --dtop single
To enter mirror mode (both display show same image, useful for presentation) use:
# aticonfig --dtop mirror
Note: you need to restart X server to changes take effect.
Note: you will not be able to use POWERplay in dual head mode. To use POWERplay when in mirror mode you have to disable overlay on second head with command:
# aticonfig --ovon=0
Sound
ATI Technologies Inc SB450 HDA Audio works with ALSA driver snd-hda-intel from alsa-source package.
To install ALSA form sources use:
# aptitude install alsa-source
# m-a a-i alsa-source
Note: you may use ALSA drivers included in kernel, but they may be a bit outdated.
If you got so many errors similar to this when loading module:
ALSA /usr/src/modules/alsa-driver/pci/hda/hda_codec.c:215: hda_codec: invalid dep_range_val 0:7fff
If you see those errors try to create file /etc/modprobe.d/sound with this content:
options snd-hda-intel probe_mask=3 position_fix=3
ALSA mixer may not work at all showing only this error:
alsamixer: function snd_mixer_load failed: Invalid argument
To fix this remove /var/lib/alsa/asound.state, reload driver with command:
# rmmod snd_hda_intel
# modprobe snd_hda_intel
Then save this asound.state as /root/asound.state.
And restore settings with:
# alsactl -F -f /root/asound.state restore
Note: aumix works fine.
dmix / dsnoop setup
This sound card cannot mix audio streams itself and forbid multiple access to sound device. As a workaround we can use dmix and dsnoop ALSA plugins. It will mix everything in software.
Download .asoundrc and save it as ~/.asoundrc.
MIDI sequencer setup
This sound card does not support MIDI itself. As a workaround we can use Timidity++. It will synthesize MIDI in software and send as wave to PCM device on real sound card.
Install timidity, freepats and alsa-utils:
# aptitude install timidity freepats alsa-utils
Edit /etc/default/timidity and uncomment:
TIM_ALSASEQ=true
Load snd-seq module (and add it to /etc/modules):
# modprobe snd-seq
Then restart timidity:
# invoke-rc.d timidity restart
Finally, try to play some mid file:
$ aplaymidi /path/to/sample.mid
Ethernet
Realtek Semiconductor Co., Ltd. RTL-8139/8139C/8139C+ (rev 10) works fine with 8139too driver.
# dmesg | tail
8139cp: 10/100 PCI Ethernet driver v1.2 (Mar 22, 2004)
8139cp: pci dev 0000:06:01.0 (id 10ec:8139 rev 10) is not an 8139C+ compatible chip
8139cp: Try the "8139too" driver instead.
8139too Fast Ethernet driver 0.9.27
ACPI: PCI Interrupt 0000:06:01.0[A] -> GSI 21 (level, low) -> IRQ 50
eth0: RealTek RTL8139 at 0xffffc20000058000, 00:16:XX:XX:XX:XX, IRQ 50
eth0:  Identified 8139 chip type 'RTL-8100B/8139D'
eth0: link up, 100Mbps, full-duplex, lpa 0x45E1
To enable automatic module loading on access to eth0 add this to /etc/modprobe.d/network:
alias eth0 8139too
Note: Use ifscheme package to easily maintain different network configurations.
Wireless LAN
Atheros Communications, Inc. AR5005G 802.11abg NIC (rev 01) handled by madwifi driver.
You need to install from sources:
# aptitude install madwifi-source madwifi-tools madwifi-doc wireless-tools
# m-a a-i madwifi-source
# modprobe ath_pci
Driver initialization log should appears in dmesg log:
# dmesg | tail -n 13
ath_pci: 0.9.4.5 (0.9.3)
ACPI: PCI Interrupt 0000:06:02.0[A] -> GSI 22 (level, low) -> IRQ 233
wifi0: 11b rates: 1Mbps 2Mbps 5.5Mbps 11Mbps
wifi0: 11g rates: 1Mbps 2Mbps 5.5Mbps 11Mbps 6Mbps 9Mbps 12Mbps 18Mbps 24Mbps 36Mbps 48Mbps 54Mbps
wifi0: H/W encryption support: WEP AES AES_CCM TKIP
wifi0: mac 7.8 phy 4.5 radio 5.6
wifi0: Use hw queue 1 for WME_AC_BE traffic
wifi0: Use hw queue 0 for WME_AC_BK traffic
wifi0: Use hw queue 2 for WME_AC_VI traffic
wifi0: Use hw queue 3 for WME_AC_VO traffic
wifi0: Use hw queue 8 for CAB traffic
wifi0: Use hw queue 9 for beacons
wifi0: Atheros 5212: mem=0xc0200000, irq=233
To enable automatic module loading on access to ath0 add this to /etc/modprobe.d/network:
alias ath0 ath_pci
STA mode
Edit /etc/network/interfaces. Add these lines:
auto ath0
iface ath0 inet static
        address 192.168.0.3
        netmask 255.255.255.0
        network 192.168.0.0
        broadcast 192.168.2.255
        gateway 192.168.0.1
#       hwaddress ether 00:XX:XX:XX:XX:XX # if you need to spoof it
        dns-nameservers 192.168.5.1
        wireless-mode Managed
        wireless-essid StarGate
        wireless-key xxxxxxxxxxxxxxxxxxxxxxxxxx # if you need any key
        wireless-keymode restricted
#       wireless-ap xx:xx:xx:xx:xx:xx # change to AP's MAC
#       wireless-sens 60
#       wireless-retry min 100 retry max 250
#       wireless-rate 11M
#       wireless-nick NickName
#       post-up modprobe tun ; openvpn --config /etc/openvpn/stargate-client.conf \
#        --daemon --mute-replay-warnings # to connect using VPN
#       pre-down killall -q openvpn ; sleep 3 ; route add default gw 192.168.2.1 ; rmmod tun
You need to know AP’s MAC you connecting to. You may obtain it by scanning. To start scan type:
# iwlist ath0 scan
Association is made after you specify AP’s MAC:
# iwconfig ath0 ap 00:01:02:03:AB:CD
Finally check if you are associated typing:
# iwconfig ath0
ath0      IEEE 802.11g  ESSID:"StarGate"
          Mode:Managed  Frequency:2.422 GHz  Access Point: 00:01:02:03:AB:CD
          Bit Rate:0 kb/s   Tx-Power:9 dBm   Sensitivity=0/3
          Retry:off   RTS thr:off   Fragment thr:off
          Encryption key:XXXX-XXXX-XXXX-XXXX-XXXX-XXXX-XX   Security mode:restricted
          Power Management:off
          Link Quality=0/94  Signal level=-92 dBm  Noise level=-92 dBm
          Rx invalid nwid:0  Rx invalid crypt:0  Rx invalid frag:0
          Tx excessive retries:0  Invalid misc:0   Missed beacon:0
Monitor mode
Madwifi support Monitor mode on this card. It works with kismet and airodump.
To put card into Monitor mode use:
# wlanconfig ath0 destroy
# wlanconfig ath0 create wlandev wifi0 wlanmode monitor
Edit /etc/kismet/kismet.conf, add new source:
source=madwifi_ag,wifi0,madwifi
Finally start kismet:
# kismet
Note: kismet create kis device automatically, so you do not need to create device by hand.
Packet injection
You need to install aircrack-ng:
# aptitude install aircrack-ng
Packet injection works with standard Debian’s drivers. Start kismet, then use kis device with aireplay-ng (or create device by hand). Arpreplay and deauth attacks works.
Some patches are available from patches.aircrack-ng.org. I did not try them as madwifi driver works fine for me.
Bluetooth
Switching Bluetooth switch in front of keyboard attaches Broadcom dongle to USB.
Power on bluetooth adapter. Check kernel messages:
# dmesg | tail
ohci_hcd 0000:00:13.1: wakeup
usb 3-3: new full speed USB device using ohci_hcd and address 3
usb 3-3: configuration #1 chosen from 1 choice
Install Bluetooth software:
# aptitude install bluetooth bluez-passkey-gnome obexftp
Make your phone visible, then run:
$ sdptool browse
Inquiring ...
Browsing 00:0F:XX:XX:XX:XX ...
[...]
You should see your phone’s services.
Edit /etc/bluetooth/hcid.conf, set:
security auto;
passkey "chosen-default-pin-eg-01234";
name "SomeName";
iscan disable;
pscan enable;
Restart bluetooth daemons:
# invoke-rc.d bluetooth restart
Try to list files in your phone.
$ obexftp -b 00:0F:XX:XX:XX:XX -l
Now your phone and computer will ask for PIN. Supply same PIN to both. Directory list of phone should appear.
PCMCIA
Works out of the box:
Yenta: ISA IRQ mask 0x0cf8, PCI irq 177
Socket status: 30000006
pcmcia: parent PCI bridge I/O window: 0xa000 - 0xafff
pcmcia: parent PCI bridge Memory window: 0xc0200000 - 0xc02fffff
pcmcia: parent PCI bridge Memory window: 0x50000000 - 0x51ffffff
WLAN card inserted and removed:
pccard: CardBus card inserted into slot 0
PCI: Enabling device 0000:07:00.0 (0000 -> 0002)
ACPI: PCI Interrupt 0000:07:00.0[A] -> GSI 20 (level, low) -> IRQ 177
wifi1: 11b rates: 1Mbps 2Mbps 5.5Mbps 11Mbps
wifi1: 11g rates: 1Mbps 2Mbps 5.5Mbps 11Mbps 6Mbps 9Mbps 12Mbps 18Mbps 24Mbps 36Mbps 48Mbps 54Mbps
wifi1: H/W encryption support: WEP AES AES_CCM TKIP
wifi1: mac 7.8 phy 4.5 radio 5.6
wifi1: Use hw queue 1 for WME_AC_BE traffic
wifi1: Use hw queue 0 for WME_AC_BK traffic
wifi1: Use hw queue 2 for WME_AC_VI traffic
wifi1: Use hw queue 3 for WME_AC_VO traffic
wifi1: Use hw queue 8 for CAB traffic
wifi1: Use hw queue 9 for beacons
wifi1: Atheros 5212: mem=0x52000000, irq=177
pccard: card ejected from slot 0
ACPI: PCI interrupt for device 0000:07:00.0 disabled
Suspend to RAM or disk
Install hibernate, uswsusp, vbetool and radeontool:
# aptitude --with-recommends install hibernate uswsusp vbetool radeontool
(Re)configure uswsusp (answer to all its questions):
# dpkg-reconfigure uswsusp
Update all your initramfs images (as reconfigure updates only currently running kernel):
# update-initramfs -u -t -k all
Edit /etc/hibernate/ram.conf and comment out:
TryMethod ususpend-ram.conf
with #.
Than enable:
EnableVbetool yes
VbetoolPost yes
RadeonTool yes
Edit /etc/hibernate/common.conf and comment out all VBE related option. Also consider enabling LockXScreenSaver or LockConsoleAs.
To suspend to RAM use:
# hibernate-ram
And for suspend to disk:
# hibernate-disk
Software
You may install 64-bit (AMD64) or 32-bit (i386) version of Debian. I decided to install Debian “unstable” for AMD64 architecture.
This was enormously helpful in getting my system (Xubuntu Gutsy Gibbon AMD64 7.10, a derivation of the Ubuntu 7.10 based on Debian GNU/Linux) up and running with hibernation. Thank you for this concise, clear, and nearly comprehensive guide. Bookmarked!
With linux-image-2.6.23-1-amd64 my memory card is detected now.
Abit un related stuff :
to send your laptop to sleep when you close your lid and plug out the power : http://bsh83.blogspot.com/2007/12/how-to-run-function-when-you-close-your.html
Also i am using 2.6.23 kernel (debian) but i was unable to actually see the event when you put in the card can you see the content of the card when you plug it in if so please write which models are loaded and what excatly you do for it to work .
Hi Jabka now I use 2.6.24 and when I put my canon SD memory card in the laptop (I use gnome) gthumb download the photos immediatly.
The device is /dev/mmcblk0p1 and it is mounted to /media/disk/
hth
Gerard
Hmm no wonder i couldnt get 3d working on my mobile x1300, at least 2d works with propriety drivers.Is there anyway to get 3d working with my card?
wow!!! i’m impressed!
solves a lot of problems for me!!!
thank you
i’m having some problems using a ipod with my debian etch: gtkpod, amarok and rhythmbox don’t initialize with ipod plugged.
do you know what may be happening?
ps: everything were nice when i was using ubuntu gutsy….
please send the software of wabcam acer5102WLMI because the mine is out of order and me very far from our house please help me acer
well, the alsamixer problem was not solved for me!
everytime i reboot my note i have to reconf the sound follwing your tutorial. looks like alsactl store is not working properly…
hello,
i’ve reported a weird ‘problem’. I own the same laptop as you do, tho my debian lenny says the cpu has only one single core, as shown bye the dmesg command:
dmesg | grep powernow
[ 16.748010] powernow-k8: Found 1 AMD Turion(tm) 64 X2 Mobile Technology TL-50 processors (1 cpu cores) (version 2.20.00)
[ 16.748010] powernow-k8: 0 : fid 0x8 (1600 MHz), vid 0x13
[ 16.748010] powernow-k8: 1 : fid 0x0 (800 MHz), vid 0x1e
i notice tho, that there’s a 0 and a 1, but cpuinfo doesn’t inform about the two cores either:
cat /proc/cpuinfo
processor : 0
vendor_id : AuthenticAMD
cpu family : 15
model : 72
model name : AMD Turion(tm) 64 X2 Mobile Technology TL-50
stepping : 2
cpu MHz : 800.000
cache size : 256 KB
fdiv_bug : no
hlt_bug : no
f00f_bug : no
coma_bug : no
fpu : yes
fpu_exception : yes
cpuid level : 1
wp : yes
flags : fpu vme …
As you can see there is no “cpu_cores: 2” line there, unlike your ‘cpuinfo’ file capture.
any ideas?
thank you! : D
Your ALSA module options got my microphone working. I’d spent hours on that. THANKS!
— Chris